Showing posts with label teaching. Show all posts

Jun 25, 2016

Book Trailer? Try a Teacher Trailer!

For years, teachers and librarians have been creating Book Trailers.  Book trailers are a great way to sell a book, or create interest in the reader before they check it out from the library.    And in recent years, Book Publishers have gotten into the game, as this format is the perfect way to sell an idea.  For instance, James Patterson has been creating book trailers for his published works for quite some time.  The reason this idea took off and has been so successful is because book trailers give the reader an idea of what to expect when they pick up the book.  


So since this idea is such a good one in terms of getting the reader to understand your focus, idea, and to ultimately draw them in to purchasing the book, why not apply this same idea to education?  Not that you are trying to sell the student on your class, but if you could use a trailer to give incoming students an idea of what to expect, they will be more prepared for class, or maybe more interested in learning.

So this week, I taught a class on Teacher Trailers.  Here's the idea:


  • Teachers create a trailer to introduce students to their class.
  • The video is linked to its own QR Code that teachers post on the door of their classroom.
  • During schedule pickup at the beginning of the school year, kids can walk through the building to find their class or classes.  
  • During that trek, they will see QR Codes on the door of their teacher.  
  • Using a QR Code Reader on their mobile device, they scan and view the trailer for their new class! 
I created one for the class just to get the idea across...but keep in mind that this was just for demo purposes, so don't laugh.  


If you're interested in creating your own Teacher Trailer, here are some tips I shared in the class.


Recording yourself

  • Keep your video as fancy or simple as you want.  There are several ways to record yourself.
  • If you have a webcam
  • Phone or Tablet
    • Use the camera function
    • Email the video to yourself.
  • Keep videos short - 5 minutes or less.
  • Keep mistakes - kids appreciate mistakes if you make them.
  • Be yourself - kids will see you everyday anyway, so don’t try to be something you’re not
  • Get creative - wear a costume, go green screen, add fun stuff!
  • Export your video as an MP4 - this is the best format for viewing on the web.


Where do I put my video?

  • Try storing your video on:
    • Google Drive - Use shareable link for QR Code.
    • Dropbox - again, shareable link.
    • YouTube

Link your video to a QR Code


Tips for use
  • At schedule pickup time, place a sign in the lobby.  Make a big graphic saying something like “Learn More About Your Teacher”.  
  • Info to include:
  • A mention that some teacher doors will have a QR Code students can scan
  • Suggestions for QR Readers that can be downloaded for iOS and Android
  • Take a screenshot of the icon and tell them it is available in their App Store.

Ready to try a trailer for yourself? There's no better time to create one. Get your video set up the way you want it, and be ready to post it before school starts next Fall. If you have a webpage, post the link to the video on your teacherpage. Parents can view it as well, and this will help them get to know you, and gives you the change to convey important information to them.


May 20, 2016

Screenshots, Screencasts, and Animated GIFs

This week,  Maureen Tumenas wrote to the Techy Coach asking what I use to make GIFs and Videos for my Tiny Tutorials.  Over the years, I have found that teachers attending PD training want two things:
  • Step by Step Instructions
  • Visuals in the form of Screenshots or Animations
Being a visual person myself, I work best when I can see a process, better than if I were just to follow a set of instructions.  With that, I have worked to incorporate both video tutorials and Animated GIFs into my articles and posts.  There are some great tools out there.  In this article, I'll highlight the tools I use most, as well as a few others that are available to get the job done.

SnagIt by TechSmith


  • This Chrome Extension from TechSmith is a great tool for grabbing Screenshots or recordings in the Chrome Browser.  You can also create Animated GIF Files from your Video recordings.  While this tool has been handy, it is soon being retired from TechSmith.  While they are retiring it, you can purchase the full version of SnagIt from their website and get more information about the retiring of this extension here.  Personally, I'll be sad to see this one go, as it is a great tool!  But the full version has more bells and whistles and is worth the purchase.

Camtasia by TechSmith


  • Camtasia is a full featured tool that allows you to import audio, video, and images into a multi-track editing tool for the creation of studio-quality videos.  I use this for my Tiny Tutorials on YouTube and on the Techy Coach Blog.  This tool costs around $179.00 at the Education Price.  $299.00 for non-Education consumers.  I highly recommend this tool if you can afford it.

Photoshop


  • If you have access to Photoshop, you can create Animated GIF files without having to find an alternate program or software. Just open PhotoShop, and follow the instructions in the video below.  This will only work with static images, but if you have screenshots or pics for each step of the process you are trying to provide instructions for, Animated GIFs can be just as handy as a video.  


Screencast - o - Matic

  • If you're looking for a FREE tool to create screencasts, this is the one for you.  It works in browser, or you can download a launcher that allows you to record a screencast from your browser with audio.  


More Links for Animation and Video Tools

  • Screencast.com - Free online service from TechSmith
  • Jing - From TechSmith - captures short recordings or images or video. 


May 18, 2016

Ya'll Ready for This? Chart Integration for Docs and Slides!

I have been waiting for this for quite some time.  People have asked if it is possible, and I always had to say no.  But not any more.  What is it you might ask?  Didn't you read the title?  It's chart integration for Docs and Slides! 

If you have a chart or graph in Google Sheets, you can easily integrate it into a Google Slides presentation or a Google Doc!  Just go to the Insert Menu and choose Chart > From Sheets.


Need to insert a chart from a Google Sheet into Google Slides?  Its just as easy...


Not only that, but once your chart is in your Doc or Slides presentation, you can jump directly to the Sheet your chart originated from and update it with one click.  Also, you can change your data to update the chart, and reflect changes to your presentation or doc with one click.


I so could have used this just about a month ago when, across our district, 5 different school sites were inputting data regarding a vote on textbook publishers for adoption year into several linked Google Sheets.  All the data was gathered and shown in a graph on Sheets.  We wanted to have a graph that reflected the change in votes as the data came in, but that also showed up in a Slides presentation.  So glad to see this update.

So for all the science teachers out there, you can create a slide presentation with an active Google Sheets graph, linked to data from a student spreadsheet.  As data is collected or input by students, you can update your findings on the screen in real time.  This is great for lab day!


May 12, 2016

Gettin' Crafty with Class Announcements


Picture

A few weeks ago, I taught an intro course to our science faculty on Chromebooks.  The most popular Chrome Extension of the day was Crafty Text.  If you haven't seen this little gem, it is worth is weight in virtual gold.  Out of all the tools that we covered that day, this was the most popular hands down.  


What does it do?  

Let's frame it this way. If you've ever been in a computer lab with 30+ students, or say you have a class of kids with mobile devices, you'll love this.  Let's say that on the fly, you want them to go to a specific website.  If you try to tell them out loud, you have to repeat yourself a million times.  If you write it on the board, they either can't see it or can't read your writing.  And if they look on the screen, the URL is usually too small.

In comes Crafty Text.  This Chrome Extension sits on your browser toolbar, and allows you to post a banner of anything you type, on your screen.  


How does it work?

To use Crafty Text, just click on its icon in the extension bar.  A text box will open.  Type what you want your class to see in the banner, and hit Enter.  When done, click the icon again and your banner disappears.  It's that simple!


What else can it do?

Well, it is a pretty simple tool, but the applications are endless.  Crafty Text can be used for:

  • Simple instructions
  • Bell Ringer Activities
  • Share a Web Address
  • Post a Password to Google Classroom


With the latest release of this Chrome Extension, there are more options: 


  • Adapt Text Size
    • If you have text that you don't want to wrap in your banner, and it needs to appear on one line, check the Adapt Text Size box.  
  • Show Suggestions
    • If you have previously typed a message on Crafty Text, and type it again, it will show a suggestion from previous entries.


Apr 9, 2016

Boost the Power of Comments When Grading Google Docs

The greatest thing about Google Apps for Education is that teachers can go paperless.  By making lessons available on Google Classroom, or affording students the flexibility of submitting work via Google Docs, there is little to no need for paper submitted work.  And, it also takes away the argument of "my dog ate my homework".  Unless your dog eats the internet, I think that excuse is gone.

The only thing greater than going paperless, is the ability to leave comments when grading student work. If you haven't already noticed by now, there is a Comments button at the top right of any Google Sheet or Doc.


Teachers can also change from Editing to Suggesting in a Google Doc.  Suggesting allows any edits typed on the page to become suggestions that students can use later to update a Draft before turning in a Final Submission.


But when it comes to grading digital submissions, one of the complaints I hear from teachers is that they tire of typing the same comments over and over again.  There is a way to combat this task, if you feel the same way.

In Docs and Slides, users can use the Preferences in the Tools menu to set up frequently used phrases.  


For instance, if you wanted to leave a comment such as "hyphenate this word", but you don't want to type it over and over again, you could use the substitution "hyp" to auto insert the phrase.  

  1. Just go to Tools, and click on Preferences
  2. In the Replace / With boxes, type your shorthand preference in Replace and the long version of your comment in the With box.
  3. Click OK

Now you're ready to use your substitution.  In Suggesting Mode, just click where you want to make a suggestion, type your shorthand comment, and click enter.


Happy Grading!


Mar 24, 2016

Weighted Test Questions in Google Forms

This week, Kathi Smith from Omaha, Nebraska asked the following question about Google Forms and Flubaroo:
  • "Is there a way in Flubaroo - or another add-on - where the question responses can be weighted. Answer 1 worth 3pts.; Answer 2 worth 2 pts., etc."
The quick answer to this question is, "YES!" Here's how...remember that Flubaroo is an Add On that grades Google Form submissions that show up in your Form Response Sheet (Google Sheets). To use Flubaroo:

  1. Click on the Add Ons menu of your Google Response Sheet 
  2. Choose Grade Assignment.


From there, you will answer a few prompts to setup grading. One of these prompts addresses the questions in your form. In this step, you can choose the point value to assign each question. You can choose any value between 1 and 10.


This allows you to weight certain questions more than others. After this step, you simply continue with your grade setup and you are on your way.

If you've never used Flubaroo, and you need more information on using it for the first time, watch the tutorial below. If you have other questions for the Techy Coach, use this link.


Dec 16, 2015

What's in the Data? View a Summary of Responses in the New Google Forms

In the Old Google Forms, users had the option of clicking on the Responses Menu and choosing Summary of Responses to view a list of students who have taken your assessment, as well as pie charts and diagrams showing a breakdown of student responses.  These tools are wonderful when dissecting the data to see mastery of a topic.  


You still have the same option in the New Google Forms, but it is much easier to find and allows viewing without switching to a new tab in your browser.  Just click on  Responses at the top of your New Google Form and view.  Its that easy!


Mar 27, 2015

Two New Videos: Google Tools for ELL and Publishing to the Web

Just sharing...


Two new videos have been uploaded to my YouTube Channel:


Google Tools for ELL / ESL


Google Docs:  Publishing to the Web


Mar 14, 2015

Tests, Quiz, and Review with Live Results

In the past several years, many different web tools have developed to help teachers administer tests and quizzes in the classroom. As schools advance further toward 1:1 computing and as schools go BYOD (Bring Your Own Device), administering tests has become easier.

Two of the best I have found for classroom use are discussed here:

Socrative

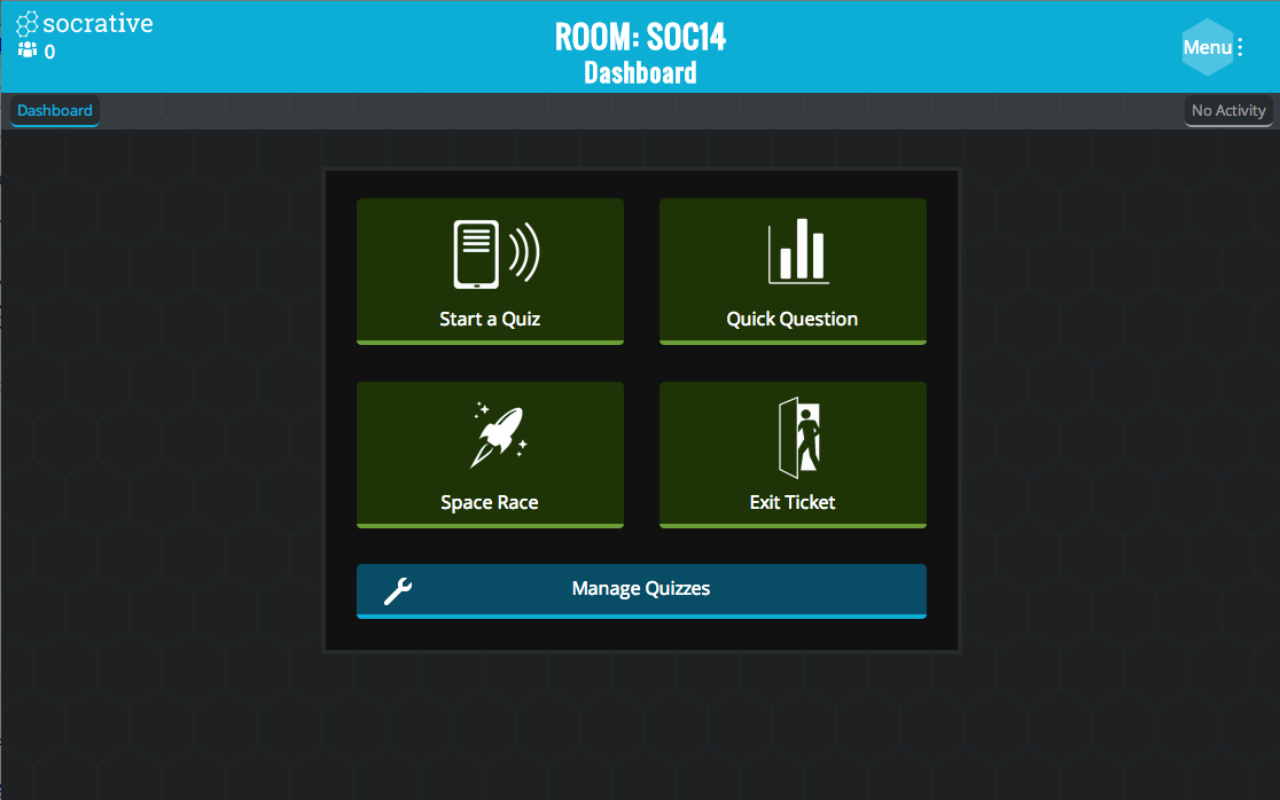
Socrative started out as an independent testing tool and was quickly snatched up by MasteryConnect.  It provides a free, simple to use interface that allows teachers to create and deploy their own tests.  Students can connect to assessments using any web enabled device (class computer, iPad, Chromebook, phone, etc...).

When you create your account, Socrative provides a Room number that students connect to.  From there, you can deploy pre-created quizzes/tests, or as a quick question on the fly.  Best of all, with Quick Questions, you can also allow students to vote on the best answer to create discussion.


Kahoot!

This site is great for stepping up student engagement.  If you've ever been out to a restaurant and you played trivia on the TV monitors supplied by the chain, then you'll get the idea of this tool.  We recently started using this during lunches to draw students into the cafeteria.  
Kahoot allows you to create your own question sets, or choose from over 1 Million public question sets over a wide variety of topics.  You can find something for everyone, ranging from Trivia Crack to Math and Science.  
Students can use cell phones or computers to engage with content.  A Game PIN is provided when you launch a question set and students join in by entering the PIN and a nickname.  A leaderboard shows the top 5 point earners to create a competitive spirit.  Great for reviewing for tests!

Jan 29, 2015

Learnin', Bloggin' and Makin' Videos

Recently, in the discussion board of my Differentiated Instruction class, we talked about different ways to teach students and ways for students to show understanding.  Much of the class focuses on student learning styles and as we talk about our own hangups in terms of learning.  

I run participants in the class through a discussion of what learning styles mean for students.  In doing so, we talk about how not all students are alike.  You will have some who are visual learners, others auditory, and some kinesthetic.  If you follow Gardner's train of thought, it can be more complex than that, but in either case, if you focus solely on an auditory means of teaching (standard lecture), you're going to lose more than half of your audience as your visual learners can't picture what you're saying and your kinesthetic learners - well let's just say they're itching to get out of their seat and out of the room!

To get teachers in the mode of understanding the impact, I have them take a Learning Style Quiz to see where they lie on the spectrum of learning.  Try these for yourself and your class:

After they take one or more quizzes to assess their style, I ask teachers to reflect on their own learning (what life was like in high school for them) and how they feel this impacts their teaching style.  As they do so, they start to see how some kids could easily be left behind (no that was not an NCLB reference) in the process of presenting content.  This quickly gets us onto the discussion of student work.  We discuss the use of  video content to present work in new ways that allow a bit of auditory and visual content. By creating your own content on video, you can flip your classroom and save time for other tasks such as projects and labs.  Take it one step further and get your kids to create content of their own -  a kinesthetic learners paradise!

Try these free and cheap tools to start creating your own content:


In order to know that your students understand what is being taught, you need to assess them.  Now don't get me wrong, I'm all in favor of a simple Multiple Choice test that can be auto-scored by a  computer, but let's face it - to gauge true understanding, kids need to show us.  So why not lend them a hand and let them collaborate!  Use the tools above to help them in creating content to show understanding.  Use a Rubric to grade the process.  

But sometimes, regardless of how content is presented, some students never understand on their own.  IF they stay within their silos, they soon become frustrated.  This is why collaboration is so important.   Collaboration is key in assisting with understanding, but also fostering creativity and generating new ideas.  By placing students into groups and stations, you can create an atmosphere that allows for true collaboration.  
  • Group work and stations - Get students to work toward assessing content, checking for mistakes, applying understanding by creating their own journals - but have them do it in groups that rotate through stations.  As students move through each station, they can work as a group to comment and correct material at each station.    When they move through stations as a group, they not only benefit from the work of their own group, but the ones who have rotated through the station before them, as they begin to dissect comments and corrections made by others.  
If you don't have the time, but you have the technology, have your students work in collaboration outside of the classroom in a Discussion Forum.  Discussion Forums are great for vetting new ideas, Q&A sessions, help with homework, or just simple project collaboration.  Here are a few resources to help you get started:

Discussion Boards:
  • Today's Meet - https://todaysmeet.com/ - If you'd like a simple backchannel style discussion thread that students can interact with in realtime, Today's Meet is a great free option.  You can setup a web link for them to access, and you can choose how long you want it to stay open.  You also have the ability to download a copy of the discussion to print.  
  • Piazza - https://piazza.com/ - Great for Q&A style discussion between instructor and students.
  • Google Classroom - Must be a Google Apps for Education district to use this http://www.alicekeeler.com/teachertech/2014/09/07/20-things-you-can-do-with-google-classroom/ - Use this tool to do a whole host of things, including the ability to comment and post questions.
  • Google Docs as a Discussion Tool - https://www.youtube.com/watch?v=Pn6ZQB6fuQM - Google Drive/Docs is a free tool, so why not use a Google Doc as a discussion tool.  Watch this video to learn tips!

Finally, there is no greater way to get kids to show understanding than writing.  Blogs can help.  If you want to call it journaling, you can call it that too, but in either case, the very act of writing gets students to hash out their ideas and thoughts.  Assign students activities that they have to blog about.  One great way to do this is to have kids create technical instructions.  Give them the task of explaining a concept such as math or scientific procedure in such a way that their English teacher can understand it - and do it on a blog or discussion forum.  This idea came from a workshop on literacy integration in our school.  Wonderful idea!
Blogs:
What does all of this have to do with learning styles?  That's where we started, right!  Well, as a kid, one of the things I always hated was taking tests.  And creating dioramas - don't even get me started.  I was the type of kid that would blow it on a test, but I could always write a great essay (that may not always be evident here).  I hated making dioramas or cell projects in science, but I could make a mean poster!  A student's learning style has a great deal to do with their strengths.  Some kids are very musical/rhythmic, so why not allow them to show understanding by writing a poem, song, or dance.  Others are very visual, so whay not allow them to use that to create visuals that teach others through use of a cartoon.  

Allowing students to play to their strengths seems very simple, but many teachers don't want the complexity of grading  a hundred different projects.  My answer is to go back to rubrics.  Design a simple rubric around the concepts/standards you want students to focus on in the lesson.  Then use those key points to grade their project - not on creativity or pieces such as number of slides in a powerpoint, but their ability to relay content in such a way that others can understand it!  

So what if you receive a myriad of different projects, in all sorts of media formats! Allowing students to use their creativity means they will have more fun with it and possibly learn something in the process.  Think about this - what are your most memorable projects from school?  Were they the ones that allowed you more freedom to create in your own way, or were they the ones that forced you to do the same thing everyone else did?  

Now go with that thought and teach your kids!


Oct 4, 2014

Have Student Response Clickers Been Replaced?


This question is actually not a new one.  Clickers have been in decline in recent years as online options have changed.  But the topic came up recently as I worked with a few teachers in setting up a classroom for use with student response clickers.  The question came up as to whether student response systems were worth the time or if mobile solutions were better.

For those of you that may or may not remember, for years, eInstruction, Renaissance Learning, and Smart Response among others, flooded the market with Student Response Systems.  These systems consisted of a computer program in which the teacher could create and deploy test and review questions that students could respond to using hand held clickers.  Of course this was not a new idea as it had been around for years.  These companies had just gotten into the business of perfecting and selling the idea, which was a good one.


Flash forward a few years, and teachers started to see the emergence of free options that allowed students to use mobile devices to respond and interact with classroom content.  Some of the following may ring a bell:


Now Google has gotten into the mix in several ways.

Google Forms - You can use Google Forms as an effective quiz or testing tool by adding on a few Scripts or AddOns.  Create a Form and instead of form or survey questions, use test questions.  As students fill in your form, responses are collected in a Google Sheet.  Add-ons such as Flubaroo and SuperQuiz can be used to grade the results.

Google Chrome Apps - The Chrome Store has a whole host of Apps that can be used for student response, including Socrative Teacher & Socrative Student , Nearpod , ExitTicket, and  VirtualClicker.  While some of these require that you have a teacher account, many of them are free.

What does this mean to the classroom teacher who can't afford to buy an expensive set of clickers?  If you are in a school that has gone 1:1, or you have a checkout lab or iPad cart, these online solutions allow you to create and deploy tests in your classroom for free.  Free is definitely good in my book.  Plus if you use Google Forms, you could create quizzes or exit ticket questions to go with videos for the Flipped Classroom.

Whatever situation you are in, we are now in an educational age where free technology is closer to our grasp than ever.  Make use of it in any way you can to further your educational goals.  Just remember that technology is the tool, not the main focus.  We need to work hard as educators to help students learn that there are several tools out there to help them achieve their goals.