Showing posts with label ipad. Show all posts

Dec 11, 2014

Google Tutorials

As our district gathers steam in implementing Google Apps, we are in the midst of creating opportunities for training.  One of the best ways of providing valuable information to our teachers is through the use of short video tutorials.  With that in mind, I have started creating a series of Tiny Tutorials which I am sharing in this post for anyone interested.

Sharing a Google Doc


Sharing a Folder in Google Drive

The third video of the series is a little different from the rest, as I am experimenting with WeVideo, an add on to  Google Chrome.  For those interested in Google Chrome Apps,  you can get WeVideo here.


Uploading Files from iPad to Google Drive


Chrome Apps, Extensions, and Themes

Jun 25, 2013

Beyond the Apps: A Pedagogical Approach to the iPad #ISTE2013

This session was presented by Aaron Svoboda, secondary learning coach, Kearney Public Schools
@Mr_Svoboda

The presenter starts by saying that he is tired of attending workshops where the speaker just talked about neat apps or "hey there's an app for that!" discussions. He feels there needs to be more meaningful discussion on designing lessons with the iPad. He is big on Madeline Hunter and promotes the principle of pedagogical design and purpose driven learning.

Check out his site here: https://sites.google.com/site/svobodagct/beyond-the-apps

Why ipads?
-In terms of a modes of delivery, he uses Wikispaces or google sites.
-Kids want to use the iPad, so it automatically engages them.
-The iPad provides a contained learning environment - everything is right in front of you.

Tools he uses:
-Quizlet
-Youtube
-Safari montage
-Socrative
-Mentimeter

Anticipatory Set
When working with kids, he starts with an anticipatory set. Question them and give them an activity or discussion topic to start with. It can be a quiz or a sharing of ideas using one of the tools above.

Objectives and Purpose
Then he moves on to the objective and purpose. Not necessarily what you're doing as much as why. He uses Google Forms to get feedback from students on their level of understanding on an objective. Allows them to interact with the objective.

Instructional input
Ways material can be delivered:
-Slide Decks
-Video
-Text
-Field trips
-Slide Share
-Google presentations
-YouTube
-Google docs video
-Websites

Tips for instruction:
Chunk instruction. Break up topics with activities; provide opportunities for understanding.

Modeling
Demonstrate understanding to your kids. In terms of the iPad, the teacher should be using the iPad in the same way as the kids so they know where they are or should be. Do as you want them to do.

Check for understanding
This is something that should happen throughout the lesson. It allows kids time to process and digest information. Teachers should provide multiple checks and do it between instruction to chunk - see above.

Guided Practice
Students are given time to work with the information. Support is present either in the form of the teacher or peers. Aaron is a big fan of Quizlet.

Independent practice
Time when the teacher is not available. With making info available on a website, the info is on 24/7. The student can work and review at any time.

Closure
This he feels is often the most underused step in learning. This is the time when students summarize and share what they have learned for clarification. To show understanding he has his students use a google form to write/respond with what they have learned.


- Posted using BlogPress from my iPad

Feb 25, 2013

10 Apps for the Classroom iPad Cart


Recently, our school purchased iPad Carts for use in our schools.  The idea was to provide iPads for use in the classroom, but purchasing them on a large scale was too much.  So, by providing a cart for each building, the cart could be checked out by teachers to use as a mobile computing classroom.  iPads provide the ability to access apps for practice, web 2.0 resources, and sites for classroom research.

Being an iPad user, as I investigated different apps I already had an idea of what I would want on the iPads.  But as these were going to be used by different teachers on a larger scale, the thought process was  a little different.

Here are a few apps that I found to be crucial the the classroom iPad Cart:


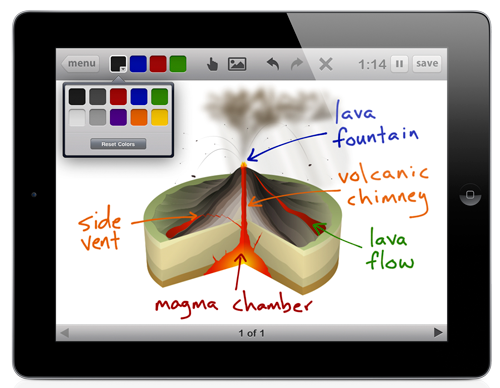
  • Educreations - Like having an interactive whiteboard (IWB) on your iPad, this app, when used with a HDMI cable or Apple TV, allows you to use tools familiar to IWB users.  Features include a pen tool, ability to erase, add pictures, text, and most of all, the ability to record.  By being able to record what you present, you can save it for later, and even share your presentation with others. 

  • Puffin Free  - iPads aren't Flash friendly, so if you're going to show certain web content that is built on Flash, it can be difficult when using the Safari browser.  This app (available for free with ads, and for a price to remove ads) gives users the ability to view and interact with Flash content.

  • Free Graphing Calculator - Math teachers will appreciate the ability to use the iPad as a graphing calculator.  There are several free calculators available, this is just one of them. 

  • iTunesU - The iPad will prompt new users to download this app and it is well worth it.  With the ability to download free course content from K-12 institutions, as well as colleges and Universities, this app gives teachers the ability to connect students with content covering thousands of subject areas.  Professional Development courses are available through iTunesU too!

  • iBooks - This app may not seem like a teaching tool to some, but many teachers have found that the ability to bookmark, highlight, and add notes to the margins makes the use of this app very handy.  For English classes, teachers can download epub files for classic novels from sites such as http://www.gutenberg.org/.  eTextbooks can be purchased from many educational textbook publishers, through the iBooks store. 


  • Socrative - Download Socrative Teacher and Socrative Student and use the iPad as a Student Response System.  Create your own assessment questions and deploy them over classroom WiFi. 

  • PenUltimate - This note taking tool allows students to take notes in their own "fingerwriting".  Keep notebooks by subject area - all for free.

  • Dropbox - download this cloud storage app and create a classroom account that will allow students to upload/store assignments in the cloud. 

  • iWork - This bundle of apps from Apple may cost a little ($9.99 for each app; less on the Volume Purchase Program if you buy more than 10), but its worth it.  Keynote is a presentation tool similar to PowerPoint that allows you to create and view slideshows.  Pages is a word processing app that allows you to create documents.  Numbers is a spreadsheet app. 
Obviously this is not an all encompassing list of everything you would need, but it is a great place to start.  The capabilities of tablets in the classroom are so great that you will discover more as you use them.  The camera and built-in microphone make iPads great for creating audio and video projects as well.  As you become more advanced in using them, investigate and explore the web for more options.  And enjoy! 

Dec 28, 2012

Updated Wiki for Educators

I recently took the time to update my Wiki for Education and Professional Development.  Several new topics have been added and old topics have been updated to repair links.  Check out the sections on iPads, Flipping the Classroom, and Common Core, and more.

Smart Tips for Smart Teachers

Jul 25, 2012

Flash Content, Flash Browsers and iOS

In the recent flurry of discussions that have occurred regarding the flipped classroom, one hurdle that I have noticed is the ability to post videos that are accessible on iOS devices (iPods, iPhones, iPads).  With the inability to view Flash content, many students who try to view videos on these mobile devices run into the issue that they are unable to view your videos.  There are a few options and a few workarounds to help your students view Flash content and videos on these devices. 

First, in terms of storing your videos, many people like to use YouTube as a place to post them.  This is fine and tends to work well when students try to view your videos on and iOS device.  One trick I have found that helps out tremendously is to share by using the URL to your YouTube video as a link from your LMS, Teacher Website, or wherever.  This means that when students click on it, it will open in the native YouTube app on their iOS device. 

If you plan to Embed your video, it helps to check the box marked "Use Old Embed Code".  The reason for this is that some sites will often reject the standard embed code which is based on HTML 5.  The old embed code is based on Flash.  I know this sounds crazy since Flash is not an option on iOS devices, but sometimes you just have to play around with the one that works.  If one doesn't work, try the other.  But always, always, always, setup your embedded video on your website and then try to view it on your iOS device to make sure it is viewable/playable.

Second, if you are not much of a techie, there are other ways to help  your students gain access to your video content on their iOS device.  The easiest route is to direct them to a Flash Browser in the App Store.  There are several good ones for free and some great ones that cost a few dollars.  A few that I have found to be good are:

Photon Flash Browser - $4.99 in the App Store - This one works great, but comes at a cost.  If students are willing to spend the money, this one allows users to view any flash content via a streaming process.  There is a slight lag, but it is not that noticeable.   For iPad/iPhone/iPod.


Rover - Supported by ads from educational providers such as Discovery Education, this app is Free!  As a result you have ads that popup at the beginning, but once you enter your site address and navigate, the ads go away while you browse.  This app is for iPad only.


Puffin Web Browser - Available as a Free and Paid App - this browser works as the others do by streaming content across the web and back to your device to provide the experience of viewing flash content.  Works great.  Expect ads on the Free version. 


Whichever route you take in making content available to your students, make sure you spend a few minutes at the beginning of the school year going over accessibility options.  This will help prevent any obstacles your students have to accessing content and viewing it as homework.  Good luck flipping your classroom!

Jul 2, 2012

Nearpod - iPad Teacher App

@KleinErin tweeted about an app called Nearpod today. This app, available for FREE in Student and Teacher versions, allows a teacher to push a presentation from their iPad to a group of student ipads with the Nearpod app installed on them.


This is something I have been waiting for for a very long time; an app that would allow the ability to share, collaborate, and poll students across the iOS platform.


Best of all, there is nothing that you need to buy. As long as you have the iPads and a wifi connection, you can use this app. All the teacher needs to do is provide their students with an access PIN that allows them to view what the teacher is presenting.

The first time I logged in, I noticed there was a "store" button. I figured it would be full of paid presentations that they wanted you to buy. But so far, the store provides a pretty good mix of free presentations (NPP Format) for download.
I also noticed that there is no button to create your own presentations. But if you visit their website, you can upgrade to the Silver edition for free. This license allows you 200MB of storage. There is a School Site License that will be coming soon.

The only drawback to using this app is that once you upgrade to the Silver Edition, you can create your own presenations but to do so you must login to the Nearpod site; you do not have the ability to create them directly from the iPad app. However, this is a small obstacle to overcome. Once you login from your PC or Mac and create your NPP Presentations, they are stored on Nearpod's site (remember you get 200MB free). I don't know how long the free upgrade will last, so you might want to check it out as soon as possible.

- Posted using BlogPress from my iPad

Jun 27, 2012

ISTE 2012: Pirates of the Class-I-Wanna-Be-In ~ The Journey to Paper's End

I loved this presentation! From the start, it was very entertaining. The presenter, Captain IO, was clad in pirate costume and brought on the full effect with an authentic pirate accent! Aargh!
The focus of this workshop was on the paperless classroom and use of mobile devices. He poses the idea that a trained "tech pirate" can find most anything:

Pull media
Pick out images
Snag shared fair-use resources
Collaborate with others
Acquire inspiration and creativity

If going paperless, Cap'n IO mentions that you have to get yer stuff from somewhere! Creating a site to put things out on the web was necessary. His choice was dreamweaver, weebly, and wix. Weebly and Wix provided a user friendly drag and drop interface for teachers who didn't feel savvy enough for dreamweaver.

He says you also need a means of assessment, content absorption, and expression. In other words, testin', learnin', and creatin'! The key is to go around the HMS Admin. that thar was a boat to avoid! Rough waters ahead he says (ya feelin' how cheeky this presentation was?).


His setup meant that he totally threw out all paper. And aside from his website, he had a teacher workstation, student owned devices, a projector, and a few other peripherals.

Keeping the attention of the kids was a problem, but he says it can be easy. What with all the activities, parent meetings, sports events,and tutoring sessions ( sound familiar), he had to keep their attention. But he needed machines. He had enough machines (rebuilt, borrowed, hijacked) to create a 2:1 ratio. Even though it wasn't 1:1 it wasn't bad. He even had a kid that brought in a PS3 because it had wifi and could get on the net. Anything to get them wired. And the techs didn't quite love it.
They complained about the hodge-podge of machines and the nightmare created by the mix. But no matter how old it was, once he reached the satisfaction of making it work, the key was it worked.


Turning in work came down to emailing assignments. Gmail was what he used. He had now entered Googledom. He had one gmail address, one site, per class.


For grading and assessment, he used Quia.com. He never had to grade homework, but he could track mastery and understanding of content.

"Thar still be big problems"

The desire would be to have a 1:1 environment, but sometimes that doesn't happen. And kids get lost and sucked in by the "Fracken" (Facebook) or other distractions. And when not all kids are working on the same device and same format, you get assignments turned in in so many formats (.doc, PDF, works, ppt, etc...) that it can be frustrating. Also, where do they take notes? How do you know the work is authentic? So rather than have them do all the work outside, it was done in class, by hand on paper; their own, not the schools. But by flipping it in this way, their understanding transformed.


But this wasn't paperless! He still depended on the kids to buy theme books for writing. Argh! There be no papers end!

"But thar be a place!"

A place called Tabletonia! They headed in to Tabletonia and found Everything he had created could be ported through one device with a battery that would last all day. But flash became a problem, as when he created his videos with Camtasia, they couldn't be viewed on iPads. But he found if when creating links, he linked to the video instead of the site, they indeed could be viewed on iPads!

As well, the iPad allowed students/teachers to record, edit, use special effects, create, and export items on one device. And rather than spend tons of dollars on graphing calculators, he used the $0.99 calculator on the app store.

Apps provided a way so that notes could be handwritten, PDF could be converted to word and back, comments could be written, and it was paperless! Try Notability. Notes can be created by hand and emailed from within the app. And in PDF format. Everything could be converted and handed in via the PDF format. You can also record. Great value.

If you want more about this great speaker go to http://templeeduneering.com/ISTE/x.html
Print out a poster of his material for your classroom.

- Posted using BlogPress from my iPad

Jun 26, 2012

No boundaries: Using iPads to reach English Language Learners

Tis afternoon I attended a session by Lisa Estrada, Program Coordinator, and Heather Parris-Fitzpatrick, Program Specialist with Nassau, BOCES. The discussion focused on the use of iPads for ESL students.

http://esltechies.com

Essential questions:

--How can educational apps strengthen and support critical thinking?
--How can digital media remove boundaries and promote achievement for ELLs?
--How can distance learning expand horizons for All students?

To answer these questions, the presenters stress their love of the iPad because it provides multimedia support, accessibility, portability, multiple modalities for learning, and that the device addresses all language skills.

iBooks was a key component of their program as they feel that it promotes critical thinking through its features:

Bookmarking
Highlighting
Note-taking
Dictionary
Search
Google and Wikipedia access

For designing curriculum for ELL and ESL students, presenters suggested resources which can be found in iTunes U. This iPad/iPod/iPhone resource provides a wealth of ESL/ELL material in the form of podcasts and vodcasts which can be downloaded as full courseware for free.


The focus of the session focused heavily on iBooks, but I must point out what some of the attendees brought up. The accessibility features of the keyboard allow users to type in their native language. As well, the standard keyboard will allow you to add special characters to your documents by pressing and holding any letter


The presenters also pointed out that critical thinking can be enhanced through use of apps such as:

ebook readers
Graphic organizers
Translators
Test prep
Subject specific apps

A list of suggestions is found on their site: http://esltechies.com


They also are big fans of one of my favorite apps, Explain Everything!.

Tis app can be used to record audio, screenshots, and screencasts along with notes, edits, and graphics. Once your video explanation is complete, it can be uploaded to the web for student viewing. This app is one of my favorites (said that already) and one I'll be covering in our Flipping the Classroom class in July!


Other apps they recommend include:

Notability - allows students to take finger written notes, or audio notes.

Photo card - allows students to write on a photo. Great for creating postcards, or even flash cards.

iTranslate - free app.

Polycom- app that allows you to connect from iPad to anyone with polycom video conferencing system.

Popplet- good For creating concept maps and charts.

For more information and tips on teaching ESL/ELL students using technology, visit http://ESLTechies.com


- Posted using BlogPress from my iPad

Location:ISTE 2012, San Diego

#ISTE12 Technology Tools and Differentiation

How do you use graphics, photos, etc...to draw interest and bring together an idea? This morning I attended a presentation on Dynamic Differentiation & Digital Age Learning by Annette Lamb in which she answered that question. Using technology, we can address the differences in our students. Technology can help us focus on the needs of groups in our classrooms. Technology can help achieve readiness, develop interests, and provide choice. Technology can do this by adding visuals, auditory components, and writing.

For instance, if a child has problems in an area such as writing or typing, an iPad can help a child as it provides a way to record and transcribe thoughts. But as well, technology can help students relay ideas or understand content through rich visual content which can attract student interest.
Create a bridge between media by connecting a reader to video or online content related to a book they are reading.

The example Annette uses is that Graeme Base, author of The Jewel Fish of Karnak has recorded youtube video commentary on his book. The online content creates an extension which can't drive student interest. Weaving these experiences and extensions together can become important.


But not all media are this rich in related content. As a result, we as educators need to work together to share resources or seek out those who have connections to content online. If something isn't available, build it yourself!
One way to turn kids on to reading is to use google as a starting point. Have a child search for a book, and read a synopsis or first few pages of a book before going to the library to check it out.

To generate interest in global topics, use the web to do a search on videos, visuals, etc... For example, on a discussion of Egypt, have them refer to sites suggested by Google to help them understand that Egypt is a real place and find out what it looks like.


Use fun tools to help them conduct their search:

-Student made tools, maps, books, artwork can be overplayed over existing content to draw a comparison. Have kids make their own map of Egypt and compare it to the real thing on google maps.

-iPad apps can help immerse students in new content. D a search for apps related to your subject.

- do a search for student work created by others and have student's critique their work for accuracy and understanding.

-put together resources using keynote or PowerPoint, Glogster, or some other web based tool.

With almost anything, you can generate student interest just by searching out supplemental videos, websites, and tools on the web. With the results you get, you can create an extension activity that enriches student understanding and interest.

As she discussed these topics, I was reminded how Apple has led us down this very path by generating iBooks textbooks that create visuals that jump off the page or provide interactive activities that go deeper into topics that normally would just lay on the page in print media. Today, she says, we have reached "a different way of thinking" and learning.
But in relating these thoughts she stresses that it is important that kids learn to generate their own content. After all, we do learn best by doing! There are a wealth of tools available to us now, especially for free, that can be utilized to generate our own content. Organizers, cameras, video tools, aggregators - all sorts of web 2.0 tools and tools on handheld devices - have given us the ability to create! Many kids have iPods of their own, or phones that carry these tools. We need to make use of these tools.

As she continues, Annette also stresses that we need to give students choice. I have been saying this for years. We need to let them choose how they analyze content, how they create content. Students don't always want to use the methods prescribed by us. They have strengths of their own; they have interests that can be used to create authentic works.

Every year, we as educators spend an inordinate amount of time learning and discussing new apps and tools that we can use. We need to apply those tools to projects in the classroom. This leads to the discussion of producing 1:1 tools such as tablets and computers. Student learning can be greatly amplified by integrating technology and allowing students to use these tools. Why do we continue to use technology behind the desk as a teacher, but expect kids to do the same old dry activities and projects? It's time to bring those tools to the other side of the desk.

- Posted using BlogPress from my iPad

Jun 25, 2012

There's an App For That #ISTE12

Attended a forum for the ISTE Special Interest Group on Mobile Learning (SIGML). Presenters promoted use of the following website, which provides a resource list of apps for most any mobile platform (blackberry, iOS, android) and any age level (pre-k to PhD).
http://www.tbrmobile.org
Many apps were presented, but discussion shifted very early on to the fact that we as teachers need to speak up and tell the publishers what content, interactive, video, etc, we would like to see in the educational apps we use. Results will happen if you ask.
A few of the super cool apps presented:
Frog Dissection by Emantras
Al Gore: Our Choice
Splashtop Presenter
Verbally - provides words and phrases and speaks them aloud for special needs kids.
News in Slow Spanish -actually a podcast - provides news commentary in Spanish -can be played at slower rate for Spanish learners. Available on iTunes.
Art Rage - painting tool for the iPad. Use a stylus!
Dropbox - cant stress enough how great this file storage app is! I use it myself. Access files anywhere.
Kobo - free books
Wattpad - free original stories
Skitch - Annotate over anything.
Puppet Pals - make your own Puppet play using characters and backdrops provided. Play back on iPad. Great for building creativity.
Check them out. The level of interactive content and productivity is wonderful.
- Posted using BlogPress from my iPad

Location:ISTE 2012 San Diego, CA

Apps with Aptitude

Cathie Loesing, Program Coordinator with the eMints National Center, presented a session this morning on the use of iPads in the K-2 classroom. She stresses that when using iPads and selecting apps for lessons that teachers should focus on the following:
Apps should promote higher level thinking
Lessons should prompt community based learning
Stress inquiry based learning
She discussed many of her favorite apps, but rather than have me pick and choose, I though I would post a link to her site so you could see the apps for yourself. She lists many paid and free apps. Enjoy!
http://appswithaptitude.weebly.com/
- Posted using BlogPress from my iPad

Location:ISTE 2012

Jun 12, 2012

ISTE 2012

The ISTE 2012 Conference is coming up on June 24-27th. This year's conference is in San Diego, CA. A few of us from our district will be attending. It is my hope and my goal to submit a few posts on this blog about what we see there. This year, there is a great deal of discussion regarding iPads, BYOD, Flipping, and Virtual Learning. I know there will be a lot to see and experience, so I'll try to share as much as possible.
The past few years have been interesting as technology has taken a greater presence in education. Where in years past, the ability to use technology in the classroom greatly hinged on budgets, there are now more free options and WiFi in schools has given teachers the ability to serve students more as they bring their own devices to the classroom. This year's ISTE workshops and topics will help to answer many of the questions I have about this and other issues regarding technology and education.
If you are interested in seeing what all the buzz is about, here is a link to the ISTE website.

iOS 6 for iPhone and iPad


Recently Apple released information at the Worldwide Developers Conference 2012, that it would be updating its iOS to version 6 in the Fall.  A few of the updates include tweaks to Siri, Maps, Facebook Integration, Safari, Phone, Email and FaceTime.  But the greatest update in terms of the field of education is Guided Access.


Guided Access will focus on schools who use iPads in the classroom and for high stakes testing.  This feature will allow teachers and administrators to limit use on the iPad to one app.  This setting ensures that students will remain on the task at hand, rather than venture into other territories when they should be focused on one app.  This works by disabling the Home button during app use. 

In addition to this, VoiceOver will be fully integrated into other areas such as Maps, Assistive Touch, and Zoom, which will allow visually impaired students greater access to content. 

This change in the iOS is huge in terms of helping teachers utilize iPads as an instrument of testing and review, as students are wholly focused on the content, rather than having the ability to wander off in other areas that would tempt them to use other resources to answer questions at a time when their knowledge of content is being tested.  As well, the other accessibility tools make this update more useful to special education students who require additional assistance when using computing devices. 

How does this change in the iOS affect you?  What are your thoughts on this change?  What other changes would you like to see Apple make in the iOS to benefit educators?  Add your thoughts in a reply to this post!

Feb 27, 2012

Flipping the Classroom...continued

I have posted a few articles regarding Flipping the Classroom in the past, but recently a colleague and I were talking about it again.  It seems that when I mention the idea of flipping, most teachers express little interest.  Not until now have I spoken with someone that wanted to try it. 

For those of you that have never heard of it, flipping the classroom is a bit of a departure from traditional teaching methods.  The way most of us learned in the classroom (and still teach), instruction is given in the classroom and then homework is assigned for, well...home.  With flipping the classroom, teachers have found that if they make "homework" about instruction and set aside classroom time for hands on practice, labs, and drill activities, students benefit more, because they get more one on one time with the teacher.  As well, they benefit from more group oriented tasks, such as collaborative projects and labs. 

How do you do instruction as "homework"?  The answer is to record instructional lectures as video and to post them online, either on YouTube, Vimeo, or a teacher created website.  As we spoke about the process, we got into the discussion of what would be needed.  Here are a few resources:

Video Production:

  • CamStudio - http://camstudio.org/ - free resource similar to Camtasia.  This resource allows you to capture screencasts.
  • Moviemaker - Available on Windows XP - if you like to record your videos the old way, use a video camera and upload your videos to your computer.  Then use Camtasia for editing.
  • Explain Everything - iPad App ($2.99) - Explain and record from your ipad, then upload to web.

After production, upload your videos to YouTube, Vimeo or your own website.   Try these links for creating your own Teacher Website:


These are just a few links to create a website.  There are tons of others available on the web.  Just be aware of your ability to upload different file types and be aware of pricing. 

Once you have created your videos, students can view them at night for homework.  What I would have given to have told my parents that my homework was to watch videos.  The big hook is that you have to make sure your students have access to the internet and the videos you are putting out on the web are available in a format they can view.  If students are viewing them on a mobile device, remember that Apple products cannot view Flash, so you might think about using a QuickTime or MP4 Format. 

The great thing about making this switch is that once your students have done their homework and watched your videos, they come to class ready to do hands-on practice.  If you're just not sure about it, here are a few articles on the process and successes different teachers have had with it:


The Daily Riff - http://www.thedailyriff.com/articles/how-the-flipped-classroom-is-radically-transforming-learning-536.php

The Chronicle of Higher Education - http://chronicle.com/article/How-Flipping-the-Classroom/130857/

Salman Khan on flipping the Classroom - http://www.ted.com/talks/salman_khan_let_s_use_video_to_reinvent_education.html


The Flipped Classroom

Educreations - iPad App

Educreations is a simple and FREE app that gives you the freedom of an interactive whiteboard with the ability to record.  Let's say you have something  you need to explain to your class.  With the Educreations app, you can use the whiteboard tools (pens and ability to add clip art) to record a short explanation on a topic, complete with audio.  When you are finished, you can upload it to the Educreations website. 


Settings allow you to share your finished video with the public or just your students.  A link is provided so that everything is seamless.  You will need to create a free Educreations account to use the app, but no login is required by your students to view your videos.  Once your account is setup, you are ready to record and post your lectures.  You can also create a course within Educreations to storehouse all of your videos.