Showing posts with label Google Slides. Show all posts

Feb 9, 2017

New Feature: Insert Google Drive Videos into Google Slides

Google released a new feature today that allows users to insert videos hosted and stored in Google Drive, directly into a Google Slide.  So if you create a video for use in a presentation, you can save it in Google Drive, and easily add it to your presentation in just a few short steps.  You can also choose how much of the video clip is shown in the presentation, and choose from other settings as well.  

Also if you are in a school district that normally blocks the use of YouTube on campus, your students can utilize the option of downloading a video from YouTube, and saving it in Google Drive.  Then follow the simple steps shown in the video below to insert the video from Google Drive.  

Just make sure that if you are using videos from YouTube, or are downloading them that you cite your source by copying and sharing the URL in your Google Slide show.  


Oct 10, 2016

Docs, Sheets & Slides - Sharing Student Presentations

This week, a question from a teacher asks:


"I have posted student presentations that they have made using Google Slides, but for a parent to view these..it says they have to sign in with a Google Account.  Is there any way to do this so they don't have to have a Google account to view these presentations?"
 This is a very common issue and can easily be resolved. The thing to keep in mind anytime you are posting Google documents on the web is to make sure you setup sharing rights properly.  

Before posting any items to the web:

  1. Click on the Share Button
  2. From the pop up menu, click Advanced.
  3. Under "Who has access" click Change
  4. Select "Anyone with the link"
  5. Under Access, select "Can View"
  6. Click Save & Done


After you have set your document up this way, you can post it to a website using an Embed Code or link by using the Publish to the Web option in the File Menu:

  1. click File
  2. Choose Publish to the Web.
  3. Click Publish
  4. Choose from a Link or the Embed (HTML) Code.


This is an easy way to share documents on the web - Docs, Sheets, or Slides - and a great way to present information to your audience.  

One key thing to remember when posting student work is that you secure permission from parents or guardians to publish student work on the web.  You might check with your principal regarding permission slips or a student contract requiring parent permission to share student work.  For example, a slip sent home similar to the following, would be a good way to get parent authorization:

Parents,  This school year, we will be using Google Apps for Education in the classroom.  Google Apps is a free suite of tools available to schools that includes Gmail, document creation, presentation tools, and other collaboration tools.  As part of that process, from time to time, we may have the opportunity to post student work on the web.  The school will work to make sure student work is shared in the safest way possible, but we want to make sure you are aware and that we have your permission to do so. No student grades will be posted.  As part of that, please sign and date this slip granting the school permission to post examples of your students' work for your viewing.


Parent Signature _________________________________________ 
Of course many districts already have a technology or internet use agreement in place, as well as permission slips for use of Google Tools. If you do not already,  you may want to do so.

Happy Sharing!


Sep 23, 2016

Google Slides - Making Presenter View Work for You

Recently, a reader posted the following question for the Techy Coach:
"I watched your video on the new back  channel available in the presenter view with Google Slides.  How do you as a presenter see this view without the audience seeing it also?"
This question comes up quite often, so I thought I would post this updated explanation about Presenter View to cover some of the features involved.


What is Presenter View for Google Slides?

Several months ago, Google released an update to Google Slides that allows presenters to take questions from the audience.  But its much more than that.  In addition to taking questions from the audience, you can control your presentation from the Presenter View Dashboard, use audience tools to display questions from audience members to the entire audience, and access a back-channel of questions from any presentation in the future.


Getting Started...

To use Presenter View...
  1. Open any Google Slides Presentation.
  2. On the Present button, click the Drop Down menu and Choose Presenter View
  3. Click Start New

Google will provide a URL address at the top of your slides that audience members can use to ask questions.  They can access this address from any mobile device.  Audience members can choose to ask questions using their profile name, or anonymously.

As audience members ask questions, they will appear in the Audience Tools pane.   If you want to present an audience member's question, you can click the Present button beneath their question.


Additionally, you can control your presentation from this window by using the presenter tools.  This allows you to move forward or backward in your presentation, and access speaker notes if you have them.

At any time, if you want to stop taking questions, just toggle the On/Off switch, and the URL will disappear from the top of your presentation, and Slides will stop taking questions.

How Do I Present My Slide Show?

The main question that pops up when using Google Slides Presenter View, as shown in the question at the start of this article, is how to display without your audience seeing your presenter tools.  

The quick answer to this is to change the display settings on your device to Extended Desktop.  However, there is not a quick way to explain how this works on different devices.  Here are a few explanations.

On a Chromebook, you can simply follow these instructions:

  1. Click on the Status Area in the bottom right of your display (clock).
  2. Choose Settings
  3. Choose Display Settings
  4. Change Options from Mirroring to Extended Display.


For a Windows
  1. Right click on your display.
  2. Choose Graphic Options > Output to > Extended Desktop.

By setting up your device and projector as Extended Desktop, you can then present your slide show on the Projected Screen, while viewing the Audience Tools on your device.  


This allows you to see your presenter tools, questions from the audience, and any speaker notes you need to access while all they see is your slide show.

Accessing Questions from Previous Sessions

As you use Google Slides Presenter View over and over, you will notice the option to Continue Recent or Start New.  As a result, you can continue a previous session, adding new questions to old questions, or you can start a fresh session with new audience questions.


As for old sessions, you can access questions from previous sessions at any time.  To do this:

  1. In the Google Slides Editor, Click Tools
  2. Choose Q&A History
  3. A pane will open at the right of your slide show displaying your Q&A History from previous sessions.
  4. Click on any date to view audience questions.


Hopefully this helps to answer questions you may have had about Presenter View on Google Slides.  This is a great tool that has many great applications including fielding questions from:
  • Audiences at Conferences and Exhibitor Shows
  • Students in Class
  • Faculty and Staff during Professional Development
  • Google Hangouts / YouTube Live
  • Parent Meetings
However you plan to use it, always make sure to test it out in advance so you are comfortable with use and settings involved.

Happy Presenting!


Aug 21, 2016

Google Apps Ideas for Elementary Teachers

This week, I will be sharing Google Apps tips with some of the elementary school teachers in our district.  I thought I would also share it here in the event that it benefits someone else.

Look for tips on Google Calendar, Drive, Docs, Sheets, Slides & Forms.  Slides include links to Video Tutorials and Sample Material.


Jun 8, 2016

Double Up Security For Shared Google Files


When sharing files with other on Google Drive, you may find that in certain situations, you need to limit how others access your files and folders, and for how long.  For instance, you may want to:

  • Share files for a limited amount of time.
  • Prevent users from Sharing your files with others.
  • Prevent users from downloading, copying or printing your files.
Luckily, Google has security features that allow you to do just that.  To change these features:

  1. Click the Share button in any Doc, Sheet, or Slide.
  2. Click on Advanced at the bottom right of the popup.
Each of these features is outlined in the videos below.  At this time, these features are only available to Google Apps for Education and Google For Work users.

Happy Secure Sharing!

How to Limit Access Features for Shared Google Files


How to Set an Expiration Date on Shared Google Drive Files

May 18, 2016

Ya'll Ready for This? Chart Integration for Docs and Slides!

I have been waiting for this for quite some time.  People have asked if it is possible, and I always had to say no.  But not any more.  What is it you might ask?  Didn't you read the title?  It's chart integration for Docs and Slides! 

If you have a chart or graph in Google Sheets, you can easily integrate it into a Google Slides presentation or a Google Doc!  Just go to the Insert Menu and choose Chart > From Sheets.


Need to insert a chart from a Google Sheet into Google Slides?  Its just as easy...


Not only that, but once your chart is in your Doc or Slides presentation, you can jump directly to the Sheet your chart originated from and update it with one click.  Also, you can change your data to update the chart, and reflect changes to your presentation or doc with one click.


I so could have used this just about a month ago when, across our district, 5 different school sites were inputting data regarding a vote on textbook publishers for adoption year into several linked Google Sheets.  All the data was gathered and shown in a graph on Sheets.  We wanted to have a graph that reflected the change in votes as the data came in, but that also showed up in a Slides presentation.  So glad to see this update.

So for all the science teachers out there, you can create a slide presentation with an active Google Sheets graph, linked to data from a student spreadsheet.  As data is collected or input by students, you can update your findings on the screen in real time.  This is great for lab day!


May 17, 2016

Now Taking Questions - Presenter View for Google Slides


A few weeks ago, Google released an update to Google Slides allowing presenters to take questions from the audience.  This new feature called Presenter View, will roll out to all Google Apps for Education users that are on Scheduled Release, on Wednesday, May 18th.  


This handy new feature is great for creating a more interactive experience for students and workshop participants.  You can also use Presenter View to field questions or post them during your slide show while presenting at a conference.

Here is a quick tutorial on how it works.  


May 4, 2016

Any Questions? You Can Do That in Slides!

Today, Google Slides released an update that allows presenters to accept questions from the audience during a slide show.  This is such a huge bonus in terms of helping students feel comfortable asking questions.  If you have students that are a bit shy about raising their hand in class, they can still participate. 

This update will appear right away for Rapid Release users, and very soon for Scheduled Release GAFE users.  To see a preview of how it works, view this video from Google.

To use Presenter View:

  1. Open your Google Slides presentation
  2. Click the Dropdown menu next to the Present Button
  3. Choose Presenter View
  4. Choose Audience Tools and Click Start New
  5. Share your link to your audience. (Comments in Sharing settings must be enabled to allow users to ask questions)

There is also a Laser Pointer option available when you are in presentation mode.  Once you present your slideshow, you can select Laser Pointer from the floating toolbar and your mouse becomes a Laser Pointer!  Very cool!


Apr 9, 2016

Boost the Power of Comments When Grading Google Docs

The greatest thing about Google Apps for Education is that teachers can go paperless.  By making lessons available on Google Classroom, or affording students the flexibility of submitting work via Google Docs, there is little to no need for paper submitted work.  And, it also takes away the argument of "my dog ate my homework".  Unless your dog eats the internet, I think that excuse is gone.

The only thing greater than going paperless, is the ability to leave comments when grading student work. If you haven't already noticed by now, there is a Comments button at the top right of any Google Sheet or Doc.


Teachers can also change from Editing to Suggesting in a Google Doc.  Suggesting allows any edits typed on the page to become suggestions that students can use later to update a Draft before turning in a Final Submission.


But when it comes to grading digital submissions, one of the complaints I hear from teachers is that they tire of typing the same comments over and over again.  There is a way to combat this task, if you feel the same way.

In Docs and Slides, users can use the Preferences in the Tools menu to set up frequently used phrases.  


For instance, if you wanted to leave a comment such as "hyphenate this word", but you don't want to type it over and over again, you could use the substitution "hyp" to auto insert the phrase.  

  1. Just go to Tools, and click on Preferences
  2. In the Replace / With boxes, type your shorthand preference in Replace and the long version of your comment in the With box.
  3. Click OK

Now you're ready to use your substitution.  In Suggesting Mode, just click where you want to make a suggestion, type your shorthand comment, and click enter.


Happy Grading!


Apr 5, 2016

The Techy Coach Chrome Extension

Techy Coach Video Tutorials are now available to users as a Chrome Extension.  Now you can access tutorials through a popup window, allowing you to work while you learn.  


Topics available through the extension include:

  • Google Drive
  • Google Docs
  • Google Sheets
  • Google Forms
  • Google Slides
  • Google Drawings
  • Google Classroom
  • Gmail
  • Google Calendar

Just go to the Chrome Web Store and search for Techy Coach.  You can also use this direct link.

Mar 3, 2016

Google Apps Updates - Google Sheets and Templates for Docs

This week, Google dropped two updates that are sure to whet your appetite.  Take a look at these changes!

Google Sheets

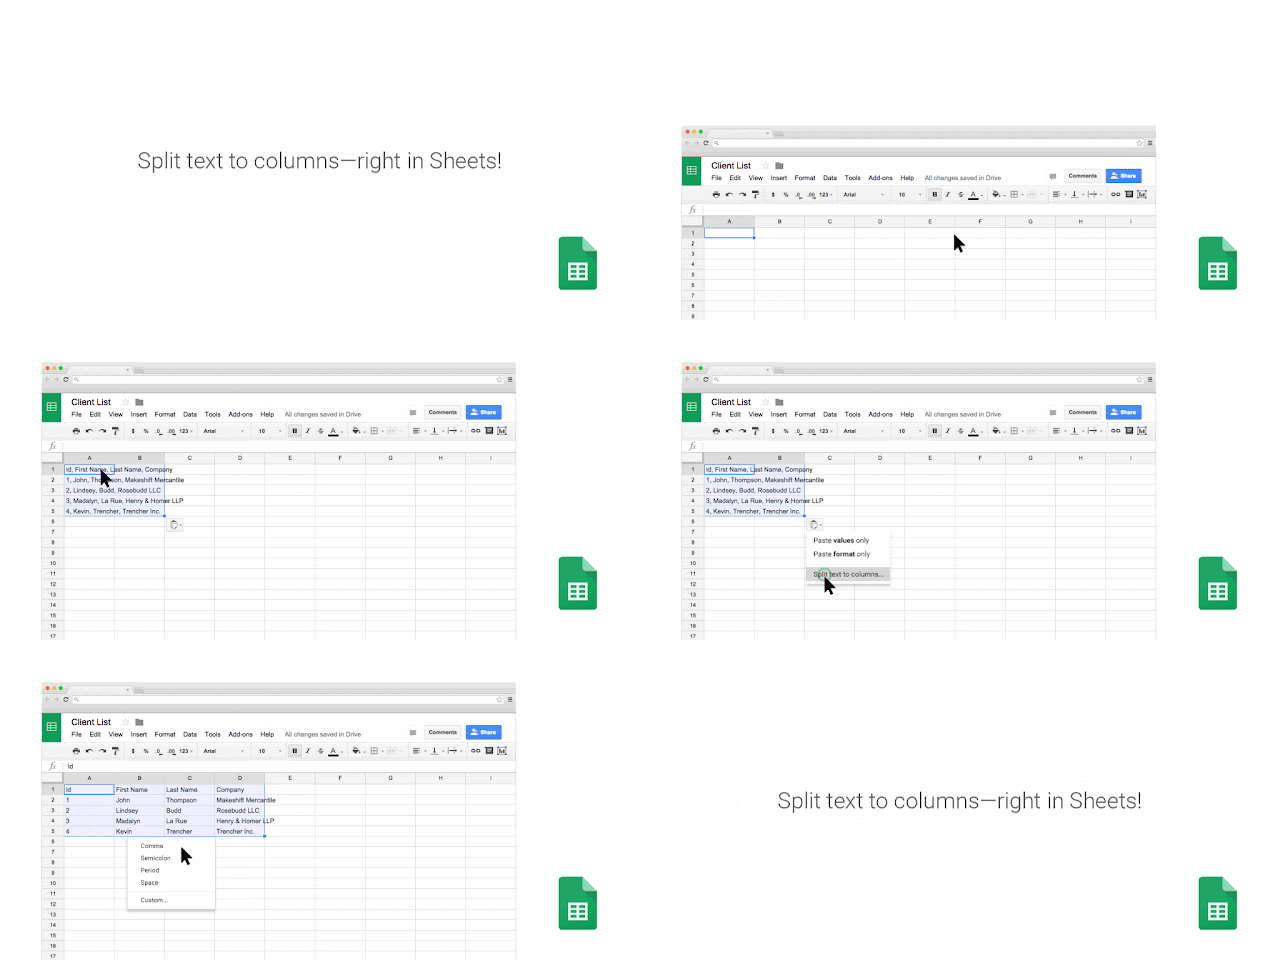
For all of you spreadsheet lovers who have been waiting for a text-to-column tool, its here!  On March 1st, Google added a Text-To-Column option allowing you to split text into separate columns.  Here is a sample along with the post from Google


Templates for Google Docs

Also, today, Google released new templates available for Docs, Sheets, and Slides users.  These templates have been created by pros like Quickbooks, Google Science Fair, and Reading Rainbow.  To use Templates, all you have to do is click on the File menu of any doc, choose New and Template.


You can also access the templates by visiting the main links for each doc:


Dec 29, 2015

New to Google Drive? Check out this handy Cheat Sheet!

If you are a new Google Drive user, you may need the help of a handy cheat sheet.  Try this one on for size.  If you need extra help, you can also find some useful tutorials on my webpage.  Happy Googling!  Click the image below to download...

Dec 28, 2015

Templates Available for Google Mobile Apps

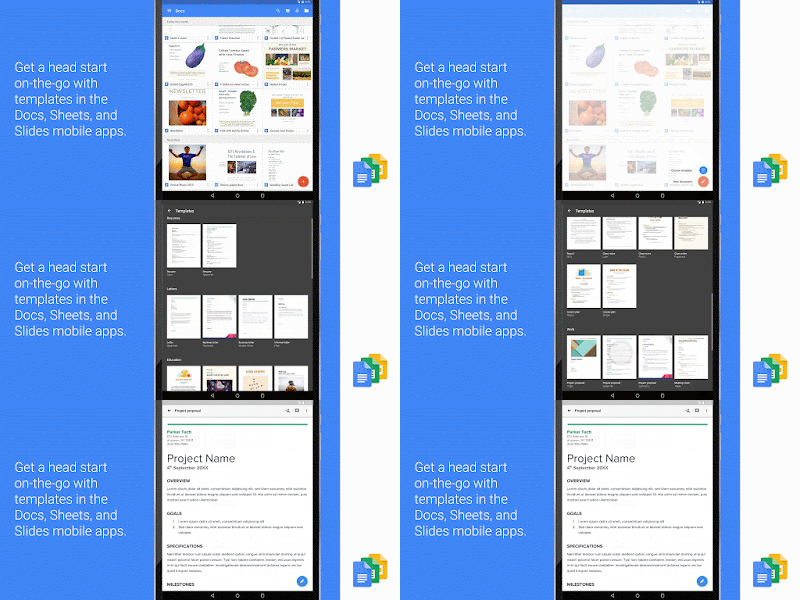
If you've been waiting with bated breath for the coming of templates to Google Mobile Apps, then wait no longer!  Yesterday, Google launched templates in Docs, Sheets, and Slides for iOS and Android.  

Now when you create a document in any of these apps, you have the option of choosing from several templates.  Now formatting is a breeze, as it has already been done for you.  Take a peek at left.  

Make sure to visit the iOS app store or Google Play Store for your mobile device and update your apps to see these changes.  Also visit the launch site to see more about these changes.